I made these last night and realized they weren't on my blog yet. It is one of our most favorite recipes. It comes from my mom's cook book and she made it for us a lot growing up. I tell James every time, what she would say every time, "The only thing about this recipe, is you can't try it to make sure it is good, or tasting right." (because it's all mixed with raw meat...) But it is kind of a no-fail recipe. I have exchanged ingredients and not added ingredients because I didn't have them and they always turned out great! (Sorry for the lack of picture, I thought about this after we devoured them all).
Li'l Cheddar Meat Loaves
1 egg
1 c. shredded cheddar cheese
1 tsp. salt
3/4 c. milk
1/2 c. quick cooking oats
1/2 c. chopped onion
1 lb ground beef
2/3 c. ketchup
1 1/2 tsp mustard
1/2 c. brown sugar
1. Preheat oven 350 degrees
2. In a bowl beat egg and milk. Stir in cheese, oats, onion, and salt. Add beef and mix well. (I usually just do this part with my hands). (Also I like to mix in some of the Ketchup mixture into the loaves)
3. Shape into eight oval shaped loaves (like footballs), place on a greased 13 in x9 in x2 in baking dish.
4. Combine Ketchup, Mustard, and brown sugar, spoon over loaves. (I like to include part of this mixture into the meat loaf as well)
5. Bake for 45 minutes or until the meat is no longer pink.
Monday, November 14, 2011
Friday, November 4, 2011
Spritz Cookies
 My mom gave me this cookie press for my bridal shower. I have had good intentions to pull it out and use it for a long time. One night when James was at a Foot ball game I decided to get it out and experiment. It was so fun and these cookies were so good and easy to make with the press. James loves them and we have made them a couple of times since.
Spritz Cookies
1 cup butter, softened
2/3 cup sugar
1 egg, slightly beaten
2 1/4 cup flour
1/2 tsp baking powder
1 tsp almond extract
1. Cream butter. Mix in sugar and egg mix well.
2. Add remaining ingredients, and mix well.
3. Place dough into cookie press, Press cookies using various shapes, place on ungreased cookie sheet.
4. Top with sprinkles if desired. and Bake 375 degrees for 8-10 minutes.
Curry Chicken Salad
I got this recipe from a co-worker. I have made it a couple of times this last month and I haven't taken a picture but it sure is good. The key ingredient is the Rice A Roni. YUM! I think it tastes best on Croissants.
Curry Chicken Salad
1 box of Chicken Rice A Roni (follow instructions on box)
saute 3-4 chicken breasts then shred or cut up into small pieces which ever you want
cut up 4-6 green onions
cut red grapes in halves (as many as you want)
cut up celery small (as much as you want)
1/2 cup slivered almonds (roasted)
3/4 cup light miracle whip
3/4 cup light mayo
1 Tblsp lemon juice
1 Tblsp curry powder
mix all together keep chilled and serve on your favorite rolls or croissants.
Wednesday, October 19, 2011
Jolly Rancher Rainbow Suckers
 I got this "recipe" from Traci, who got it from my mom, who got it from one of Mckay's soccer moms, who I'm sure found it on pinterest. (which I have recently been introduced to and I am trying to figure out). I decided to try it with my cub scouts. (Yes. I am the newest called cub scout leader... ) It was a HUGE hit. They were asking for pencils so they could write down the recipe, like it was something they planned on making regularly. It was fun. And now I am sure they will be begging me to make them
 every meeting from here on out.
Jolly Rancher Rainbow Suckers
parchment paper
jolly rancher candies
sticks (I used skewers and cut off the pointy end)
1. Preheat oven to 275 degrees
2. line jolly ranchers on parchment paper. put in oven for 8 minutes and place stick in the middle when they come out of the oven.
Thursday, September 29, 2011
Shout Out to the Taco Salad
 There are some meals that really require no recipe, but sometimes we just need a reminder that they could be an option for dinner tonight. For the sake of this blog, I will give a "Shout Out" to some of my favorite easy dinner ideas. These "Shout outs" are meals that require less than 15 minutes of preparation, and a lot of times you can use left over materials that you have in your pantry and fridge to put them together. The first was Hawaiian Haystacks. I love these kind of meals, because they use ingredients that I keep well stocked in my kitchen, and if i don't have all of them, or have others to throw in, it usually works out.
I love taco salad, and let's be honest because it is so easy, we eat it a lot. Especially on those late home from work days.
Taco Salad
ground beef (browned)
1 can of beans, drained (any kind really)
taco seasoning
1/4 onion, diced
lettuce (any kind works)
tomatoes, diced
olives, sliced
cheese
salsa (we open a can of Pato)
ranch or sour cream
chips
avocado (if you have it, I rarely have them on hand)
1. I like to brown the ground beef with onion, beans and taco seasoning. (you could replace the ground beef with shredded chicken or keep it vegetarian with just beans)
2. Throw on what you like, how you like it. Enjoy!
Thursday, September 22, 2011
Grandma Sullivan's Chilli
 If you are a Sullivan/ Wells/ Webb and visit Grandma Sullivan during lunch time, you know Grandma Sullivan's Chilli. She makes a big pot of it and keeps it hot on the stove for anyone to that drops by. And it will be what you get for lunch everyday until it is gone. It is so easy to make and so delicious and great for big families.
Sunday I had my sullivan cousins over for dinner and made a big pot of this chilli. I also surprised them with a Grandma Sullivan Cake! I was in St. George on Saturday and asked Grandma to make me a cake to bring for this occasion. I knew she could not say no to pleasing a few of her grandkids. It was so fun. Just like old times when we would sit for hours on Grandma's front porch eating that cake and just laughing. I am so grateful for those memories and for cousins. It felt as though not a week had been missed spending a Sunday together. We laughed just as we did before.
Grandma Sullivan's Chilli
1 lb of ground beef (browned and drained)
1/4 onion diced
1 large can of Pork N Beans
1 small can of baked beans
2 cans white beans (drained)
2 cans diced tomatoes
2 cans tomato soup
1 1/2 packets of chilli seasoning
(I also like to add 1/4 cup brown sugar and a little extra chilli powder)
1. brown meat and onion and drain off grease.
2. open cans and poor it all together. (don't forget to drain the white beans) add seasonings and let simmer until cooked together.
Thursday, September 15, 2011
Six-Week Bran Muffins
 I got this recipe from the Food Nanny's Cookbook. (If you haven't checked this cook book out, you should be convinced by now to go and get your own copy. Every recipe is SO GOOD! I have not been disappointed yet.) I have been wanting to try this one for awhile, because I love bran muffins but thought it was a little big for just the two of us. We have had James' parents at our house for a few days and I thought this would be a perfect time to try it out. More people to eat the muffins and hot muffins every morning,... I come off as a very impressive house wife, when really it takes seconds to pop them in the oven.
The theory is the dough lasts for six weeks as long as it is stored in an air tight container in the fridge. So you can pull it out, bake as many or as few muffins as you would like and then pop it back in the fridge for another day. And they are SO GOOD! Did I mention I love bran muffins? Plus it is really impressive to have fresh hot muffins any morning of the week.
Six-Week Bran Muffins
5 cups whole wheat flour
5 tsp baking soda
2 tsp salt
2 tsp ground cinnamon
6 cups raisin bran or bran flakes cereal
3 cups sugar
4 eggs
1 cup canola oil
1 quart buttermilk
2 tsp vanilla extract
1. Combine the flour, baking soda, salt, and cinnamon in a very large bowl. Add the cereal and sugar, and mix.
2. Beat the eggs in a large bowl. Blend in the oil, buttermilk, and vanilla. Pour the egg mixture into the cereal mixture and stir well.
3. Transfer the batter to a large plastic container with a tight-fitting lid and refrigerate until ready to use. The batter will keep for 6 weeks.
4. When ready to bake, preheat the oven to 375 degrees and generously grease muffin cups or use cupcake liners (way faster). Do not stir the batter before filling the cups about 2/3 full. Bake until the tops spring back when touched, about 20 minutes.
Red Sauce and White Sauce
 James really likes Italian food, so I think that is why I am so interested in Italian cooking. I like to please him since he is my biggest critic... or only critic. (Unless you come over for dinner, then I promise you I will aim to please.) So while most people are interested in making bread from scratch (I tried once. Failed. Have yet to try again. Don't judge me. I will master bread making another day.) I wanted to know how to make spaghetti sauce (or red sauce) from scratch. The Cake Boss made it on his show one time and it looked fairly easy.... Well, let me tell you, I made it. It is delicious, but it is NOT easy. It takes a good amount of time and if I were to make it again, I would like a lot of help, a big kitchen, and lots more tomatoes like they had on Cake Boss. I share the recipe with you today, and if you are ambitious enough, it is REALLY good. But if you are not, stay ignorant and stick with your favorite bottled brand. (PS. mine is Barilla both tomato basil and the spicy marinara... YUM)
Red Sauce
about 12 tomatoes-seeded
3 cloves garlic
1 onion quarted
fresh basil
fresh oregano
olive oil
salt to taste
1. preheat oven to 350 degrees
2. put ingredients in oven safe dish and drizzle olive oil over the top. bake for 45 min to an hour
3. remove skin from tomatoes and process everything in a food processor. add salt to taste
4. place in a sauce pan and simmer until reduced and thick to your liking
5. serve over your favorite pizza or pasta
*Holds in the fridge for a few days or freezes well.
********

The next is your basic white sauce or Alfredo Sauce rather. I got this recipe from Traci and I have loved it ever since. You can use it for anything; pour over veggies, use as a pizza sauce, mix with red sauce over pasta, ... or just over some chicken and noodles is how we most often eat it. I like this recipe because most recipes I've tried are much more fatty and use thick cream as a base. This isn't fat free but it is much less fat filled than most Alfredo recipes out there. So enjoy.
White Sauce (Alfredo)
2 or 3 Tbsp butter
1 8 oz package of cream cheese (I always buy the 1/3 less fat kind)
1 cup milk
1 cup Parmesan cheese
salt and ground pepper to taste
1. in a sauce pan melt butter on low add cream cheese and melt on a very low temperature until creamy and with out chunks.
2. add milk slowly. adding a little and letting it combine with the cream cheese and a little more until blended and warm
3. stir in Parmesan cheese and continue to warm on stove until melted completely. Add salt and ground pepper to taste.
Best Foods: Parmesan Crusted Chicken
 I don't very often have the time to watch TV. But one night it was on and I am glad it was because I saw a Best Foods Mayonnaise commercial with this recipe. I went to the website and planned to try it immediately. All I can say, is DELICIOUS! Only four ingredients and you are on your way to a delicious mealtime. (That sounds like a commercial). It is actually part of a contest. You can go on and challenge the recipe with another one, and if voters like yours better there is a prize to be won. There are a couple of challenger recipes and I might give them a try but for now this is a WINNER. Go to bestfoods.com to see details. I share it also with you today.
***This would be SO good over some noodles and red sauce. A SUPER easy Chicken Parmesan! (Way easier than the one I shared before, although I still like that recipe).
Parmesan Crusted Chicken
1/2 cup Best Foods Mayonnaise
1/4 cup grated Parmesan cheese
4 boneless chicken breasts halved (or chicken tenderloins)
4 tsp. Italian seasoned bread crumbs (I make my own with just crushed crackers, Italian seasoning and garlic salt, SO EASY and delicious. You can use it whenever you need bread crumbs)
1. Preheat oven to 425 degrees
2. Combine Mayonnaise with Parmesan cheese. Arrange chicken on baking sheet and spread mayo mixture over the top of each breast. Sprinkle bread crumbs over top of each chicken breast.
3. Bake for 20 minutes or until chicken is thoroughly cooked.
Saturday, September 3, 2011
Surprise Fruit Cobbler
 This is a small disclaimer: This recipe blog is NOT a healthy recipe blog. I like healthy food, and I like to make healthy food, but let's be honest, healthy does not always equal delicious or decadent or ... yummy. I share delicious, decadent and yummy recipes on this blog. Sometimes they are healthy... this one is NOT. Hence the disclaimer. But it is DELICIOUS!
This recipe comes from the Food Nanny's cook book. I've mentioned her cookbook before. I like it a lot. I went to a demonstration she did and someone asked the question, if so many of her recipes are filled with cream, butter, or cheese, how she is able to stay so thin. She said that she just eats less. She would rather eat less good tasting food, than more of the other stuff. I agree. Thank you Food Nanny.
I made this the other day because we had a bunch of peaches that were going bad that needed to be used. And since it is that time of year when peaches are in season (and other fruit) I thought it appropriate to share my favorite cobbler recipe. It is so good. You can use whatever fruit you want, fresh, frozen, or canned. And any combination, but she says that in the recipe. So check it out for yourself.
Surprise Fruit Cobbler
1/2 c butter cut up
1 c flour
1 c sugar
2 tsp baking powder
3/4 c milk
3 1/2 c fresh, or canned fruit drained (I have used frozen before, and it works fine)
3/4 c firmly packed brown sugar
Ground cinnamon
Ice cream or whipped cream (Necessary)
1. Preheat the oven to 350 degrees.
2. Melt the butter in a square baking pan in the oven. Remove the pan from oven
3. Stir the flour, sugar, baking powder in a medium bowl. Stir in the milk. Gently pour the mixture into the melted butter in the baking pan. Do not stir.
4. Place fruit of your choice evenly over the batter, top with the brown sugar, ad sprinkle with cinnamon. Bake until the cobbler is well browned and fruit is cooked. The baking time will vary depending on the fruit. Start checking for doneness at 40 minutes.
*Serve right out of the oven, with ice cream.
**The surprise is that the fruit starts out on the top and ends up on the bottom... SURPRISE!
Wednesday, August 31, 2011
Comfort Cake
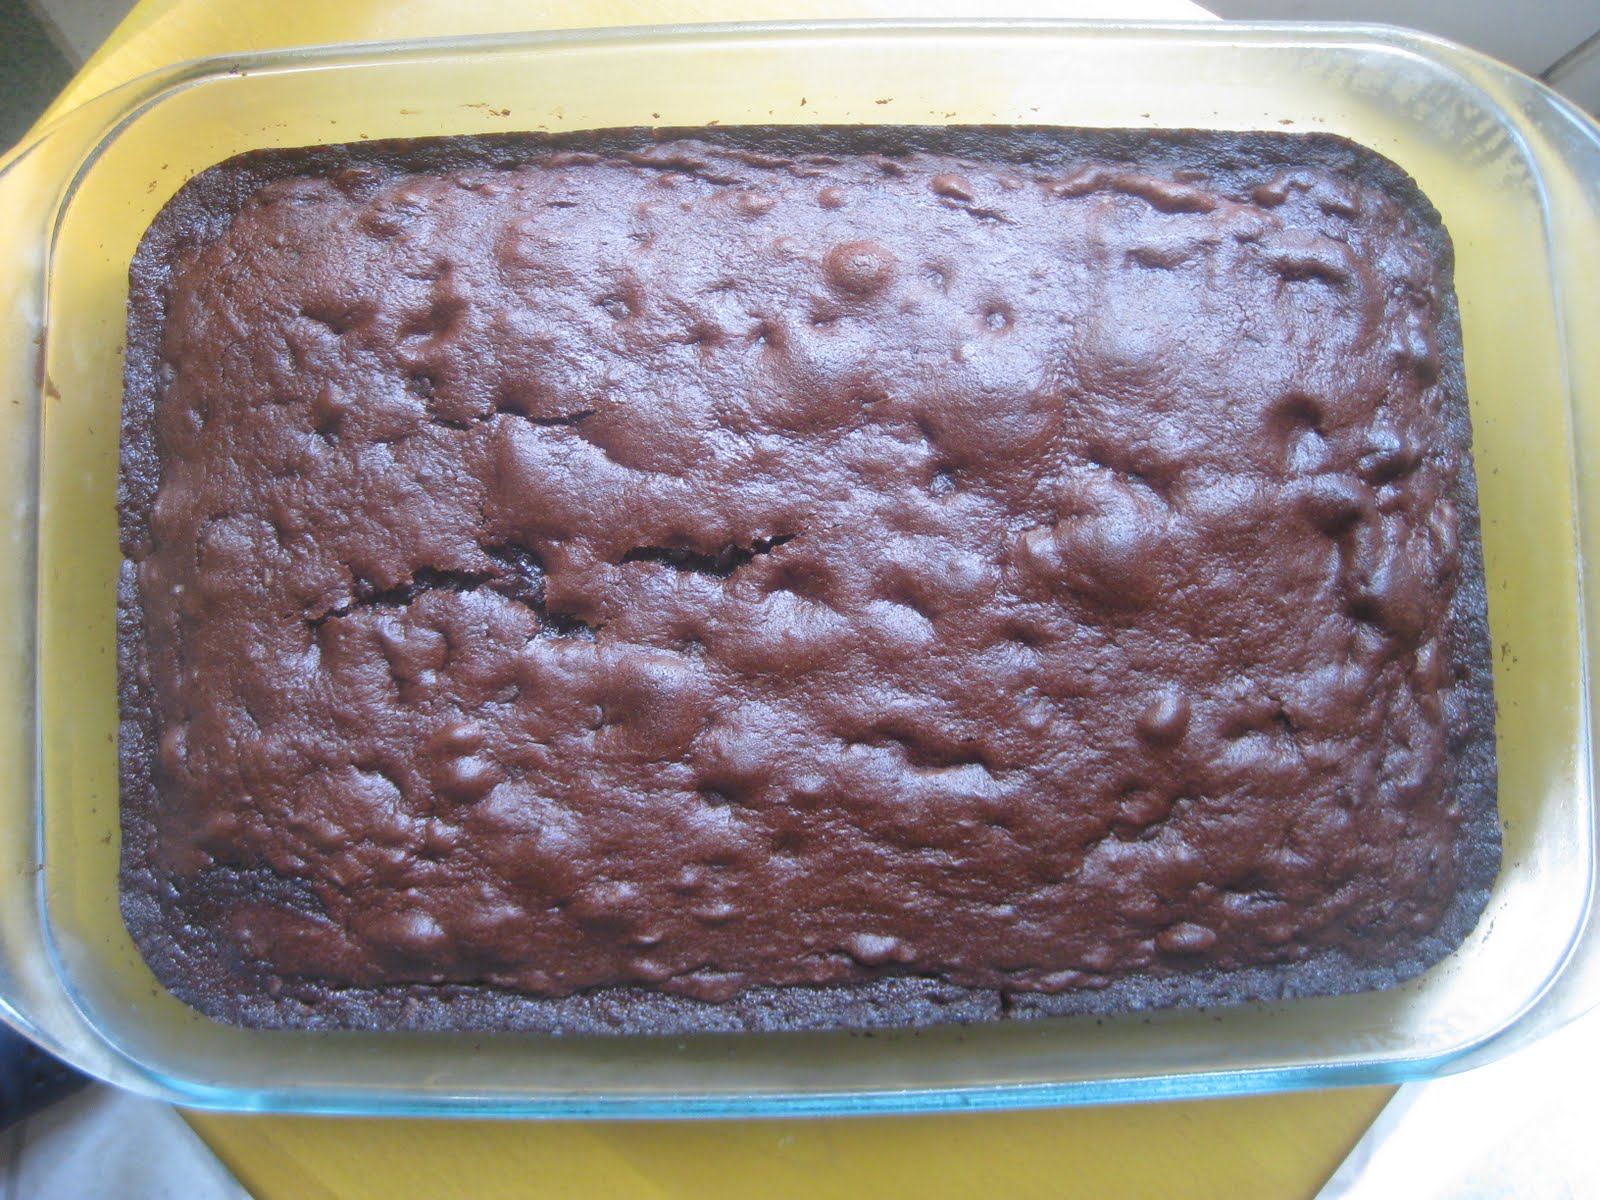 So I got this recipe from Traci. (I have no idea where she got it from, and let's be honest, as long as good recipes get passed my way, I credit the sharer of the recipe as the original source). I haven't made this cake for awhile but Traci made it just last week for Max's birthday. It is her picture I share today along with "her" recipe.
I love this cake. Anyone who knows me knows that I am always looking for homemade, moist cake recipes. This still uses a cake mix, but for all the extra ingredients added, it is good enough for me. The best part is that it is delicious by itself. It does not need icing. But like Traci said to me the other night, "but it sure is good with icing too!" Enjoy!
Comfort Cake
1 box devils food cake mix
1 small box instant chocolate pudding
1 cup low fat vanilla yogurt
1/2 cup pure olive oil
4 large eggs
3/4 cup warm water
1 large package mini semi-sweet chocolate chips
1/2 cup powdered sugar
1. Preheat oven to 350 degrees. Coat one 9x13 inch pan with olive oil cooking spray.
2. In mixer bowl add cake mix, pudding mix, yogurt, eggs, and olive oil. Blend on medium speed for 2 minutes.
3. Turn mixer onto low speed and slowly add water. Mix until well blended. Fold in Chocolate Chips.
4. Pour into pan and bake for 40-45 minutes or until knife comes out clean in the center. Cool in pan and then sprinkle with powdered sugar.
*Thanks Traci!*
Thursday, August 25, 2011
Easy Creamy Italian Chicken and Rice (for the Slow Cooker)
 This is one of my go to recipe's when I just don't have the time to make dinner. I know it is one of JoEllen's too, because I have had it at her house more than once. The great thing about it is that it is very kid friendly.
Easy Creamy Italian Chicken and Rice
1 or 2 lbs of chicken (I just throw in frozen chicken)
1 can cream of chicken soup
1 8 oz package of cream cheese
1 packet of Italian salad dressing mix
Rice (follow directions on package whether minute rice or in a rice cooker)
1. In a slow cooker put the chicken at the bottom, cream cheese, soup, and dressing mix all together and put on low.
2. After a couple of hours when chicken is thawed and cream cheese is melted some, mix around with the soup and mix. Leave in the slow cooker until chicken is cooked through.
3. Before serving, cook rice and shred chicken if desired. Top rice with creamy chicken.
Cake Decorating again... Woohoo!
 This is my first attempt at cake decorating since my class this summer. It was fun to "get my icing on" again for a work triple baby shower. The only difference is I actually had to make my own cake and frosting this time. Just making the frosting the right consistancy was probably the hardest part of the process.
Wednesday, August 24, 2011
Our Favorite Tin Foil Dinner
 I love tin foil dinners. I love anything that you can just throw whatever you got in your fridge or pantry into something, bake it and comes out delicious. This is a recipe that happened on accident, but I have since made it every time we are in need of a tin foil dinner to bring to a party or cook out.
Our Favorite Tin Foil Dinner
Pork Chops, thawed (one per dinner)
Some sort of pork rub, or just salt and pepper
Asparagus, chopped
Zucchini, Chopped (optional)
1/4 Onion, Chopped (good for about 2 or 3 dinners)
1 can of Cream of Mushroom soup
1 Tbsp Butter (or less if you like)
Salt and Pepper to taste
1. Rub pork chops with seasoning or salt and pepper, and sire all sides in a hot pan with a little bit of oil spray.
2. Tear two large pieces of tin foil. Put the prepared chop on the bottom and pile on veggies, then add some salt and pepper, then Tbsp butter and then about 1/3 cup of cream of mushroom soup.
3. Make sure you write your name on the outside. You do not want your tin foil dinner getting mixed up with someone else's, because I promise if you bring this tin foil dinner, it is better than theirs.
4. Cook over hot coals or in your oven for about 30 to 45 minutes or until done.
Friday, August 19, 2011
Nacho Night
 If you haven't experienced Nacho Night, call me. I will hook you up, as I myself was hooked up. Nacho Night is the greatest invention I've experienced this month. Yes folks, this month. Here's the story:
We were in the middle of moving from the old place to the new place. Everything was in two places and not a complete kitchen in either. Ashlee and Bryce our friends from the MTC bookstore answered the call. "What can we do to help?" they said. I answered, "You can have us over for dinner tomorrow." Ashlee answered back, "Hey, I have a great idea! How about you guys come over for dinner tomorrow?!!" That was a great idea.
It was a Saturday, and on Saturday's Ashlee and Bryce head over to Ashlee's parents for Nacho Night.... They shouldn't have invited us because we invited ourselves again the next week. They were gone the weekend after that or I guarantee we would have been there again. Instead we had our own Nacho Night.
These aren't your kid's ballpark nachos. Please don't even compare. Instead have your own Nacho Night and ENJOY!
Nacho Night
Tortilla Chips
Nacho Cheese, heated
Refried beans, heated (canned is great)
Ground beef cooked, drained, with Taco seasoning
Pico de gallo (diced tomatoes, diced onion, chopped cilantro, lime juice, salt, Optional: diced jalapeno) or salsa
Olives, chopped
Avocado, chopped (or guac)
Sour Cream
1. Pile on what you like, and enjoy with some good stories, jokes and your favorite youtube videos.
Sunday, August 14, 2011
This is a shout out to the Hawaiian Haystack
 I have lived in Utah my entire life and the first time I tried a Hawaiian Haystack (believe it or not) was after my mission when I was at least 23. I remember the day clearly. I went downstairs to the St. George Temple cafeteria after completing a session and Hawaiian Haystacks was the menu item of the day. As they asked me the toppings I wanted, I thought it was the strangest mixture of food I had ever seen. I ate it. I probably didn't hate it, but was just overcome with the weirdness of the ingredients that were on top of the rice and chicken soup mixture that I didn't revisit this recipe again until after I had Lucy. Some ladies in the ward brought it to us for a dinner one night and I instantly fell in love. We have probably eaten it a dozen times since our second meeting and it will be a recipe revisited often in the Stewart home.
I feel a little silly including the recipe here, but I do so regardless, just in case you don't know what to make for dinner tonight. You should make Hawaiian Haystacks. Easy. Delicious. Done and Done.
Hawaiian Haystacks
2 cans of cream of chicken soup
1 can chicken broth
2 c chicken cubed or canned
4 c rice, cooked
1 c chow mein noodles
3 tomatoes, diced
1 c celery, chopped
1/2 c green onion, chopped
1 can pineapple chunks, drained
1 c cheese, grated
1/2 c almonds, slivered or sunflower seeds
1/2 c coconut
1/2 c green pepper, chopped
(Other optional items could be peas, cilantro, other canned fruit, etc)
1. Combine soup and chicken broth in a medium saucepan to make gravy. Stir to blend, and add chicken. Simmer about 8 to 10 minutes or until heated through.
2. Assemble rice, gravy and toppings as desired.
Chicken Bacon Ranch Calzones
 So this recipe was mentioned as a side-note at the bottom of the pizza dough recip, but in the Stewart home came to a consensus that it deserves its own post. They are so yummy and a real crowd pleaser. So I am sorry to mention this again, but I wanted to do the recipe justice. And other than the dough, its not a recipe I found some where but the combination of ingredients just makes sense. (FYI: pictured are the calzones we made individually the first time. When I made them again, I made them all myself and they were much more uniform.... and pretty. Sorry I don't have that picture.)
Chicken Bacon Ranch Calzones
Pizza dough (recipe listed in past post)
1 or 2 lbs of chicken breasts or tenderloins (I like the frozen kind in the big bag)
uncooked bacon (I just use whatever I have available. You don't need a lot because bacon has so much flavor, I usually use about 1/4 of a package and I like to buy the stuff with more meat and less fat)
2 fresh tomatoes (diced)
1 to 2 c shredded cheese (whatever kind you have in the fridge will do)
Ranch
2 Tbsp butter
1 tsp garlic salt
shredded Parmesan cheese
1. Make pizza dough, set aside. (or you could thaw some roads rolls dough that would work too)
2. Bake chicken and bacon together on 350 for about 20 minutes or until both chicken and bacon are completely cooked through. (I like to separate the bacon and lay it on top of the chicken so that it gives the chicken a nice flavor) Shred the chicken and the bacon together and set aside.
3. Roll out small pieces of the prepared dough until flat and fairly thin. Spread about 1 Tbsp or less of ranch, then a little of the chicken bacon mixture, cheese, and diced tomatoes. Fold dough in half and pinch edges together. Set on a greased baking sheet and repeat until dough or toppings are gone.
4. Melt butter and mix in garlic salt and spread on the top of each calzone. Sprinkle with Parmesan cheese. Bake for about 11 or 12 minutes or until calzones are a nice golden brown color.
*I would serve with a green salad and it makes for a fantastic meal.
Friday, July 15, 2011
Cheddar-Broccoli Soup with Potatoes
 Even though this recipe comes from Our Best Bites cookbook, I probably would not have made it before some other recipes in that cookbook, but one of my X mission companions, who also has a cooking blog (Kayla, I hope you know I have a cooking blog because you inspired me ... to copy your idea) HIGHLY recommended this recipe. And I love soup! So I made it and she was right... it is delicious! Thanks Kayla. And thanks Mormon Mom's In the Kitchen. Your cookbook is inspiring and your beautiful pictures make me hungry every time I open your book.
Cheddar-Broccoli Soup with Potatoes
1 1/2 Tbsp butter
1 c diced onion
4 cloves garlic, minced
2 (14.5 oz) cans chicken broth
1 large baking potato, peeled and diced into 1/2 inch cubes
2 med heads broccoli, chopped (about 4 c florets and stems)
3 oz cream cheese
2 c low-fat milk
6 Tbsp flour
2 tsp kosher salt
1/4 tsp freshly ground black pepper
4 c shredded sharp cheddar cheese
3 Tbsp fresh or 1 Tbsp dried parsley
1. In a large stockpot, heat the butter over medium-high heat. When hot, add the diced onion. Saute for 1 minute and then add garlic. Saute 1-2 minutes longer or until onions are tender.
2. Add the chicken broth and potato and bring to a boil. Cover, reduce heat, and simmer for 10 minutes. Add broccoli. Continue to simmer with the pot covered for about 5 more minutes or until both potatoes and broccoli are tender.
3. While the soup is simmering, combine cream cheese, milk, and flour in a blender and process until smooth. When potatoes and broccoli are tender add the milk mixture to pot. Season with salt and pepper.
4. Simmer for about 5 minutes, stirring occasionally until thickened. Remove from heat and stir in cheddar cheese and parsley. If desired, use an immersion blender to blend until desired consistency is reached. you can also pulse it in a blender. (I didn't. I like the chunks.)
Thursday, July 14, 2011
Chile Relleno Casserole
 I'm back. Sorry for the delay. I was on vacation in St. George, but I have not stopped cooking and collecting good recipes to add to this blog.
I got this recipe from my mother-in-law. I have mentioned my love for New Mexico and more for green chilies. Cora (James' mother) hooks us up with frozen green chilies that I love. For the longest time I only knew a couple of green chile recipes. Cora changed that when she sent me a whole stack of green chile recipe cards her ward had collected and put together some time ago. It has been fun to experiment with a few of them and now my green chile supply is quickly diminishing.
I remember my mother used to make a casserole similar to this when I was child. I remember because my dad and her were the only ones that liked green chilies so she would only put green chilies in half of the casserole and the rest was just the egg and cheese mixture (her recipe didn't call for meat). When I served a mission and learned about real chile relleno and learned to love it, I often was reminded of the chile relleno (minus the chilies) my mom used to make and it would make me laugh.
Chile Relleno Casserole
1 lb hamburger
1/2 tsp salt
2 small cans green chile
1 1/2 c milk
4 eggs (beaten)
1/2 c chopped onion
1/4 tsp pepper
1/2 c grated cheese (I used a lot more cheese... because cheese is yummy)
1/4 c flour
1/2 tsp salt
(I cut up corn tortillas for a couple of layers in between to make the casserole go a little further)
1. brown meat and onion. Season with salt and pepper.
2. put 1/2 of the green chile in bottom of casserole dish, add cheese, add 1/2 meat, (this is where I added a layer of cut corn tortillas) add rest of the meat, more cheese, (another layer of corn tortillas if you choose) and the rest of the green chilies on top.
3. beat milk, flour, eggs, salt and pepper together. Pour over the top of casserole and bake for 45 minutes on 350 degrees.
**Substitute sausage for ground beef to make breakfast casserole
**James and I decided we like this casserole the best served with salsa or hot sauce over the top of it. OOooo it's so good!
Saturday, July 2, 2011
Chloe's Vegan Chocolate Strawberry Cupcakes
 I have always been interested in cooking for people with food allergies or special diets. When I was going to college I had a few friends that were lactose intolerant. I found it a fun challenge to adapt recipes so that they could enjoy them as well.
I am not a vegan nor will I ever be but I do love Vegan and vegetarian cooking. I found this recipe in a magazine I was reading at the gym. I also love the food channel and have watched several episodes of cupcake wars. I have seen Chloe compete on these wars and she always makes vegan cupcakes. She won with this recipe and it was published in this travel magazine. I had to try it. Even if you are not a Vegan, if you like cupcakes, these are absolutely delicious. They are not any less fattening because they are vegan, but they are delicious.
Chloe's Vegan Chocolate Strawberry Cupcakes
1 1/2 c flour
1 c sugar
1/3 c unsweetened cocoa powder (preferably dutch processed) (I used cheap store brand cocoa, tasted great to me)
1 tsp. baking soda
1/2 tsp. salt
1 c water
1/2 c vegetable oil
2 Tbsp distilled white vinegar (I used what I had in my house, which I think was apple cider vinegar)
2 tsp. vanilla extract
Frosting & Finishing
1/2 c shortening
2 2/3 c powdered sugar
2 tsp vanilla extract
about 4 Tbsp non-dairy milk
1 1/2 c sliced strawberries
1. Preheat oven to 350 degrees. Line a 12- cupcake muffin pan with cupcake liners.
2. In a large bowl, whisk together flour, sugar, cocoa, baking soda, and salt. In a separate bowl, whisk together 1 c water, the oil, vinegar, and vanilla. Pour wet mixture into dry mixture and whisk until just combined.
3. Pour batter into cup cake cups close to the top. Bake until a toothpick inserted into a cupcake comes out clean, 15 to 20 minutes. let cupcakes cool completely in pan.
4. Frosting: Using an electric mixer, beat shortening, powdered sugar and vanilla together. Beat in nondairy milk, 1 Tbsp at a time and beat until frosting is smooth and fluffy.
5. Cut tops off cupcakes and set aside. Smooth about 1 Tbsp of frosting onto each cupcake and cover with a few strawberry slices. Replace top, then add a dollop of frosting and a few tiny slices of strawberry. You can sprinkle a little bit of powdered sugar on the top to finish off. (I used an icing bag to put the frosting on the cupcakes. It worked great.)
Friday, July 1, 2011
Chicken Parmesan
 I love Chicken Parmesan, but really hate to make fried food. Mostly because I am not very good at frying food. I always use too much oil, and can't quite get the temperature right, plus I really hate the smell that lingers for days on end in my house and clothes. So I came up with this recipe that involves no frying but tastes just as great. This recipe is just based on principles I've learned but I made it up after lots of trials and errors. (Sorry for the lack of specific measurements)
Chicken Parmesan
Thawed chicken breasts, or tenderloins
2 to 3 Tbsp flour
2 eggs (beaten)
1 to 2 cups crushed crackers or croutons
1 to 2 tsp garlic salt
1/2 tsp parsley
2 to 3 Tbsp Butter (Melted)
2 Tbsp shredded Parmesan cheese
salt and pepper to taste
1 bottle of spaghetti sauce (I like Barilla tomato and basil)
Angle hair pasta cooked according to directions on box or bag (or any other noodles you like)
Shredded Mozzarella Cheese (about 1 to 2 cups)
1. Preheat oven to 350 degrees
2. Put flour in one bowl, beaten eggs in another bowl, and mix together other ingredients in another bowl.
3. Prepare a baking sheet with non-stick spray. Bread each chicken breast or tenderloin by placing thawed breast or tenderloin in the flour (just a light coating), then in the beaten egg, and then the the breading mixture completely coating the breast or tenderloin. Place on the baking sheet. Repeat until all the breasts and tenderloins are breaded. Bake in the oven for 20 minutes or cooked through.
4. While Chicken is baking, boil noodles, drain and place in the bottom of casserole dish. In the same pot used to boil the noodles heat up the spaghetti sauce.
5. Pour 2/3 of the sauce on top of the prepared noodles in the casserole dish. Place the cooked chicken on top of the bed of noodles and sauce. Pour remaining sauce on top of chicken, and cover with mozzarella cheese. Bake for 10 to 15 minutes until the cheese is melted completely.
Thursday, June 30, 2011
Pizza dough, Pizza sauce, Breadsticks, Calzones (don't be overwhelmed)
 James loves pizza! His mom made homemade pizza for Birthday dinners as a child, so he has a good reason. I also learned to make pizza when we were dating and made it for him often. Unfortunately pizza was one thing I would not eat or even look at while I was pregnant. Bad luck for James. All is well though, I can eat pizza again.
I have tried a couple of recipes but this is the one I love the most, because it is so easy, I always have the ingredients in the house and it is so versatile. Plus you can always throw what ever you have in your pantry on for the toppings. Sometimes we have pepperoni, sometimes we just have veggies and pineapple. You can turn it into bread sticks, or calzones, or make mini pizzas... and I am sure the list isn't much longer than that. But really it is so great. I will put the variations in the directions underneath so you can have them too.
This recipe comes from the Food Nanny's Cookbook. It is another one of my favorites. If you open my copy of the book it will turn straight to this dough recipe because I use it so much.
Pizza Dough
1 tablespoon active dry yeast
1 cup warm water
2 tablespoons olive oil
1 tablespoon honey
1/4 teaspoon salt
3 to 4 cups all purpose flour
1. Mix the yeast and water in a small bowl, cover, and let stand until foamy, 5-10 minutes.
2. Mix the oil, honey, and yeast mixture in a large mixing bowl (I just throw all of this into the bowl with the yeast mixture, to save on dirty dishes). If using a food processor, add 1 cup of flour at a time, up to 3 cups, mixing well after each addition. You may want to stir the third cup of flour by hand, depending on your machine. Or mix in all 3 cups of flour by hand with a wooden spoon.
3. With a rolling pin, roll out the dough on a floured surface. Gently stretch the dough to fill the pan. Using a fork poke the dough several times in different areas.
4. Let the dough rise (it will not rise very much) while you make sauce.
Pizza Sauce
1 (8-ounce) can tomato sauce
1/2 teaspoon dried basil or oregano
1/4 teaspoon garlic salt
1/8 teaspoon ground black pepper
Pinch of brown sugar
1. Mix all the ingredients together in a small bowl
2. Makes about 1 cup of sauce (one 16-inch pizza)
Pizza
1. Spread desired ingredients on top of pizza. (I find that it bakes better if you put the ingredients such as your veggies and pepperoni first and the cheese last). Also sprinkle it with a little bit of oregano. It adds a nice flavor.
2. Bake pizza on middle or top rake for 10-14 minutes at 425 degrees or until crust is golden brown and cheese is melted.
Breadsticks
Pizza dough
4-5 Tbsp butter (melted)
2 tsp. garlic salt
1 pinch of dried parsley
1. Prepare the dough according to directions above.
2. Take small pieces of dough and roll them into breadsticks (like you did with playdoe as kid).
3. Place them on a greased pan (I like to place them pretty close together so they are softer when they cook).
4. Mix the butter, garlic salt, and parsley together in small bowl. Coat the breadsticks each with this mixture. (only use about 1/3 for the first coat)
5. Let rise until dough has doubled in size.
6. Bake for 5 minutes. Take them out and coat the breadsticks with garlic butter again and replace back in the oven. Bake until golden brown (about 6 to 8 more minutes). Take them out and coat them with remaining garlic butter. (You can use as much or as little as you want, or even use low-fat margarine).
Calzones

Pizza dough
2 Tbsp butter (melted)
1 tsp garlic salt and some parsley
shredded Parmesan cheese
1. Prepare pizza dough
2. Take small amounts of dough, stretch or roll out, and fill with desired toppings. 3. Fold over dough and pinch the edges of the dough together.
4. Top with Garlic butter and sprinkle with Parmesan cheese
5. Bake for 10 to 15 minutes until golden brown. 400 to 425 degrees.
*Last night we filled our calzones with ranch (for the sauce), cooked shredded chicken, small bits of bacon, diced fresh tomatoes, and cheese. Oh Man... it was delicious.
Friday, June 24, 2011
Carrot Cookies
I love these cookies because they are orange! I got this recipe from JoEllen. They have such a great flavor and are a really light fluffy cookie. I don't have anything else to say about them but they are delicious, and taste more like orange juice cookies than like carrot cookies.
Carrot Cookies
1 1/4 c. Shortening
1 1/8 c. sugar
1 1/2 tsp. vanilla
2 eggs
1 tsp. grated orange peel
1 1/2 c. mashed cooked carrots (or canned carrots)
3 c. flour
3 tsp. baking powder
1/2 tsp. salt
1. Blend together wet ingredients (shortening, sugar, vanilla, eggs, carrots, orange peel).
2. Then add dry ingredients and mix together.
3. Bake on a cookie sheet for 12-14 minutes at 350 degrees.
Glaze to Top Carrot Cookies with
Powdered Sugar
Milk
Orange Juice
Orange Peel
1. Mix ingredients together.
2. Pour on top of cookies after they are cool.
Pancakes
 Okay, you may be thinking, "Pancakes... really...?" Stop. These are the most delicious pancakes I have ever had. Actually I have only made them once, because James is the one that always cooks on pancake night. And pancake night happens a lot around this Stewart home. We love them for breakfast too, but I would say we eat them for dinner a lot more often.
This recipe comes from the Stewart family cookbook. I think the story goes (and you Stewarts can correct me if I am wrong) that Cora (James' mother) found this recipe on the back of a mix or box of one of the ingredients and it has been a Stewart family favorite ever since then. Just last night, we had Anna over for pancakes and we were talking about how serious Josh (James' brother) in particular is about these pancakes. I distinctly remember a night we had Leila and him over for pancakes and I remember that Josh was looking over James' shoulder the entire time as he was cooking. In the end Josh did put his stamp of approval, to my relief and I am sure to his.
The other ingredient that is very important is homemade syrup. In the beginning, I was sceptical, thinking they could not add enough sugar to make this as delicious as the store bought stuff. I have since changed my ways. Not only is it cheaper, but I like it way better. It is a little bit more runny but it soaks into the pancakes better and it is not as sugary. You can also adjust the amount of sugar you put in, making it as sweet or as not sweet as you like. I am a fan.
Stewart Pancake Recipe
1 egg
1 cup buttermilk*
2 tbsp. vegetable oil
1 cup flour
1 tbsp. sugar
1 tsp. baking powder
1/2 tsp. baking soda
1/2 tsp. salt
*To make buttermilk, add and mix 1 tbsp. of vinegar to every cup of milk. Let it sit a few minutes before using.
1. Mix liquid ingredients (egg, milk, vegetable oil) in one bowl (I usually use the same bowl that I make the buttermilk in).
2. Mix dry ingredients (all other ingredients) in another bowl.
3. Then add the liquid ingredient mix to the dry ingredient mix.
4. Beat until dry ingredients are moistened (batter will be lumpy).
5. Grease griddle if necessary.
6. When turning pancakes, wait until bubbles begin to form before turning
7. Makes about 4-5 pancakes.
Stewart Syrup Recipe
1 cup boiling water
2 cups sugar
1/2 tsp. Mapleine
1. In a saucepan, boil the water
2. Add sugar to the boiling water and stir until dissolved
3. Take saucepan off stove and add Mapleine
Blueberry Cheesecake Bars
 For the last recipe I really wanted to find a blueberry cheesecake recipe. I looked in all of my cookbooks and couldn't find one. I rarely ever resort to searching on-line for recipes unless referred to a recipe on-line from a reliable source. (I've just had way too many on-line recipe disasters.) So I found a recipe in Our Best Bites cookbook for Strawberry Cheesecake Bars and decided, "Why wouldn't this work for blueberries?" PS. It did! And it was fabulous! Just exactly what I was looking for.
I have enjoyed this blueberry experiment. I may do it again sometime with some other ingredient. It reminds me of Iron Chef. I love the idea of taking one ingredient and turning it into so many different things. I just will never try to do it all in one hour. That would be stressful.
I apologize for the terrible pictures. While I am a good cook, I am not a great photographer, and I lack the equipment to make these dishes look as beautiful as they really turn out to be.
Blueberry Cheesecake Bars
(or I guess you are welcome to re-substitute strawberries and it would turn out as the author planned, that's up to you)
1 (16 oz) package of Pecan Sandies Cookies, divided
1 1/2 Tbsp butter, melted
11 oz cream cheese, softened (not low-fat) (I used low-fat, tasted fine. Delicious even)
2 eggs
2/3 c. sugar
pinch salt
1 1/2 tsp vanilla
1/2 tsp almond extract
2 c. sour cream (I also used low-fat sour cream)
1 1/4 c. blueberry sauce (blueberry syrup recipe works, jams, pie filling... whatever you have that is blueberry-ish or I guess strawberry-ish)
1. Preheat oven to 375 degrees
2. Spray 9x13x2 inch pan with nonstick cooking spray. In a food processor, process 3/4 of the pecan sandies (reserve 6 cookies). Mix with melted butter and lightly press onto the bottom of the pan. Set aside.
3. In a large bowl of a stand mixer, combine cream cheese, eggs sugar, salt, vanilla, almond extract, and sour cream. Beat on high for 4-5 minutes. Spread half of the cheesecake batter onto the bottom of prepared pan.
4. Pour 3/4 c. blueberry sauce over the batter, spreading gently to cover the surface (it doesn't have to be perfect). Spread remaining cheesecake batter over the blueberry layer and then spoon remaining 1/2 cup of blueberry sauce over the batter. Being careful not to cut into the surface of the cookie crust, swirl the strawberry mixture with a butter knife.
5. Bake for 25-35 minutes or until center is jiggly but not liquid. While baking, process remaining 6 cookies. During the last 10 minutes of baking, sprinkle the cookies on top of the cheesecake. Chill for at least 8 hours and cut into squares. If desired, drizzle remaining blueberry sauce over the individual squares.
*Just as a note, don't try and serve this hot or fresh. It really needs the chilling process to be very good.
Blueberry Syrup

This recipe is used in the next one, but I kind of just made it up from another strawberry sauce recipe i found. It is so yummy, and so delicious over pancakes or french toast.... yummmmm!
Blueberry Syrup
2 c. blueberries
1/2 c. sugar
2 Tbsp water
1 tsp vanilla
1. Combine ingredients in a medium sauce pan. Bring to a simmer over medium heat. Cook for 5 minutes stirring constantly and breaking up the blueberries while stirring.
2. Let cool and blend in a blender until reaches a smooth consistancy.
Blueberry Kuchen
 I really like this one. It comes from Taste of Home, Best Church Supper Recipes. Anna, my sister-in-law brought this recipe to my attention when I told her about my experiment. It is like a blueberry breakfast cake. I brought this to a dinner we had with my Uncle Gawain's family. My Aunt Gayle told me this is a German recipe and is pronounced Koo-Ken. I liked that.
Blueberry Kuchen
1 1/2 c. flour
3/4 c. sugar
2 tsp. baking powder
1 1/2 tsp. grated lemon peel
1/2 tsp. ground nutmeg
1/4 tsp. salt
2/3 c. milk
1/4 c. butter, melted
1 egg, beaten
1 tsp. vanilla extract
2 c. fresh or frozen blueberries
(I added a couple of heaping Tbsp of yogurt,... just for good measure)
Topping:
3/4 c. sugar
1/2 c. flour
1/4 c. butter, melted
1. In a mixing bowl, combine the first six ingredients. Add milk, butter, egg and vanilla. Beat for two minutes or until well blended.
2. Pour into a greased 13 x9x2 baking pan. Sprinkle with blueberries. In a bowl combine sugar and flour; add butter. Toss with a fork until crumbly; sprinkle over blueberries.
3. Bake at 350 degrees for 40 minutes or until lightly browned.
Thursday, June 23, 2011
The Blueberry Experiment
 I can’t remember ever buying blueberries in my life before this, but I made a goal a little while back to increase the variety of fruits and vegetables that I use in my cooking. Blueberries were on sale so I bought two pounds and thought I would experiment with several recipes and present it on my blog. So here are four great recipes that you can try if you have blueberries in your pantry.
The first recipe is Blueberry Muffins. Other than the recipes I have already shared on this blog, I rarely make muffins from scratch. I use the mixes. I think I am growing tired of mixes because I am always looking for better recipes that I could make with out the crutch of a mix. (I have yet to find a moist white cake recipe that is better than a mix.... if you have one let me know.) I feel silly saying this but I found this recipe on facebook. One of Traci's friends Julie Reber (who is my friend on facebook... you know how that goes) posted this recipe on her wall. It is from simplyrecipes.com. The author of the recipe has this to say about these muffins:
"There are three things I have a hard time resisting- my dad's tapioca pudding, Belgian dark chocolate, and freshly baked blueberry muffins. Muffins are not as hard to get right as on might think. Too dry, too dense, too sugary- these are all predicaments that one can encounter when trying to bake the perfect muffin. This blueberry muffin recipe however, from The Best Recipe cookbook, makes them just right- light, fluffy, and full of blueberries."
This is why I like it when cook books have explanations of why they like the recipes or where they got them. Most of the time these are more convincing to me than the actual ingredients of the recipe that it will turn out good if I follow the directions. I must say that whoever the other is got it dead on. These muffins are light fluffy and super yummy.
Blueberry Muffins

3 c. flour
1 Tbsp baking powder
1/2 tsp baking soda
1/2 tsp salt
10 Tbsp unsalted butter (1 1/4 stick), softened
1 c. sugar
2 large eggs
1 1/2 c. plain yogurt (I used vanilla, it tasted great)
1 tsp grated lemon peel (I put in more and I really liked the lemony flavor along with the blueberry)
1 1/2 c. blueberries
1 Tbsp flour (if using defrosted frozen berries)
1. Adjust the oven rack to the middle-lower part of the oven. Preheat oven to 375 degrees.
2. Whisk together the flour, baking powder, baking soda and salt and set aside.
3. In a large mixing bowl, cream butter and sugar together, beating until fluffy. Add eggs one at a time, beating until incorporated after each one. Beat in the grated lemon peel.
4. (This step seemed a bit nit-picky but I followed it anyway) Beat in one half of the dry ingredients until just incorporated. Beat in one third of the yogurt. Beat in half of the remaining dry ingredients. Beat in a second third of the yogurt. Beat in the remaining dry ingredients and then the remaining yogurt. Again be careful to beat until just incorporated. Do not over beat. Fold in the berries. If you are using frozen berries, defrost them first, drain the excess liquid, and then coat them in a light dusting of flour.
5. Use standard 12-muffin tins. Coat each muffin cup with cooking spray. Distribute the muffin dough equally among the cups. Bake until muffins are golden brown, about 25 to 30 minutes. test with a long toothpick to make sure the centers of the muffins are done. Set on wire rack to cool for 5 minutes. Remove muffins from the tin and serve sightly warm. (makes 12 to 16 muffins)
Wednesday, June 22, 2011
Italian Sausage Soup
 I had plans to do this post on father's day.... but I have lots of plans that get don't get done when I want them to get done. Fortunately I usually do find time eventually to to accomplish these small tasks.
In the Wells Family Cookbook, that my mom put together several years ago, there is a section called Signature recipes. This is what she has to say about my Dad's New Hobby:
"I guess with a lot of time on his hands, he's discovered the Gabby Gourmet on Channel 2 News at noon and taken up trying some of the recipes. I will include his favorites and family favorites. It's always fun when it's Dad's night to cook. he's always got some interesting new flavors for us to try."
This was in my dad's later years that he started cooking. I remember distinctly him finding a recipe on-line printing it out and sending Traci and I to the store for ingredients we had never heard of before. It was a lot of fun to cook with him. He always involved the two of us. I only remember one recipe that failed. It was some chicken pesto that was pretty nasty and I am pretty sure we chucked it and went out for hamburgers after.
There are other recipes that we cooked that I may feature later, but the following is my favorite that I cook very often.
Italian sausage soup. I keep the ingredients for this one stocked in my pantry at all times. It is so easy and so packed with flavor, I love to make it for guests when time is short. I will put the recipe as written in the cookbook, but it is not how I always make it. I have a shortened easy version that is ever bit as good.
Italian Sausage Soup
1 lb of Mild Italian Sausage (I like hot)
1 onion chopped fine
1 28 oz can Italian style stewed tomatoes
2 cans of low sodium beef broth
1 can water
1 c. pasta, uncooked (we have always used penne)
1/2 tsp. basil
1 clove garlic, minced
2 c. broccoli flowerettes
1/4 tsp. black pepper
1. slice or crumble sausage and brown, drain excess fat.
2. add onion garlic and saute until onions are trasparent.
3. add remaining ingredients and bring to a boil.
4. reduce heat cover adn simmer for 10 -15 minutes or until pasta is tender. Serve hot with warm crusty bread.
Adapted version: Italian Sausage Soup (how I make it today)
1 lb Italian Sausage
1/2 onion chopped (if I have it, if not it's fine with out)
2 cans italian stewed tomatoes (don't drain off the liquid)
2 cans beef broth
2 heads of broccoli (cut off the flowerettes and dispose of the stem)
1 1/2 c. penne uncooked pasta
water if needed
1. brown sausage with onion, pour in other ingredients and simmer until soft. (I don't like to drain the meat because the grease has a lot of great flavor and there isn't usually a ton of excess grease anyway) It is a crowd pleaser, so try it the next time you have company and not a lot of time.
Friday, June 17, 2011
Week 3 Cake Decorating (Ganache)
 Week 3: Lyndsey taught us how to work with ganache. Although it is very delicious I found it much more difficult to pick a design and decorating scheme. This picture doesn't really do the bright colors justice, but it was still lots of fun. For more pictures and to see Anna's cake visit jamesandlauri.blogspot.com.
 Thursday, June 16, 2011
Crusty Cheese Noodle Casserole
 This is basically your classic twice baked spaghetti. It may seem a little childish, but it is one of my most favorite meals. It probably always will be. My mom made this for us often growing up. It is also in our family cookbook. I still love making the food I grew up on. That's probably why I love it so much. If nothing else, it's quick easy and your kids will love it. I promise.
Crusty Cheese Noodle Casserole
1 lb (or more) ground beef
1/2 onion (chopped)
salt and pepper to taste
1 jar of spaghetti sauce
1 package of egg noodles
lots of shredded cheddar cheese
1. brown beef with chopped onion add a little salt and pepper. Drain grease and stir in spaghetti sauce, set aside
2. cook noodles according to package directions, drain
3. put noodles at the bottom of casserole dish top with spaghetti mixture, and lots of shredded cheese.
4. bake for 20-25 minutes at 350 degrees. (until cheese starts to get brown and crusty around the edges. I like it a little browner around the edges than pictured here).
****To change this recipe slightly, mix in 1/2 c. sour cream and 3/4 c. cottage cheese to the egg noodles before you top it with the spaghetti mixture. So yummy.
Tuesday, June 14, 2011
Grape Salad
 I got this recipe from my sister Traci. I got a big bag of delicious purple grapes, and I knew we would not be able to eat them all and all of the other produce that I got in my basket if I didn't get creative. I remember Traci had this recipe and decided I would try it. So GOOD! It is less appealing but very delicious. I put mine in a bowl with the sugar and nuts on top but she says to put it in a glass caserole dish with the sugar and nuts spread on top. Pictured is a half recipe. So it makes a lot. And it really works best if you have firm grapes.
Grape Salad
4 lbs grapes
1 (8 0z) package of cream cheese
1 c. sour cream
1 c. cool whip
1/2 c. sugar
1/2 c. brown sugar
1/2 c. chopped pecans
1. Wash grapes, take them off the vines and put them into a large bowl.
2. In a seperate bowl, whip together cream cheese, sour cream, sugar, and cool whip. Then add to the grapes and coat thoroughly. Place in a large caserole dish.
3. mix nuts and brown sugar and sprinkle on top. Keep cool until served.
Monday, June 13, 2011
Spicy Tortilla Soup
 I got this recipe from my friend Mike Guymon. He got it from soupnbread.wordpress.com another recipe blog that has lots of things I would like to try. Mike had us over to his place just before Lucy was born and made this for us. I love IT!! If you like the Quinoa recipe this is along that same flavor line. It is vegetarian and so flavorful I love it. PS. If you get tired of soup recipes by the time I get done with this blog, I am sorry. I LOVE soup, and I have collected a lot of great soup recipes.
Spicy Tortilla Soup
2 Tbsp canola oil
1 red pepper -seeded and chopped
1 green pepper -seeded and chopped
1 red onion, chopped and finely diced
2 cloves garlic - minced
2 Tbsp fresh oregano (or 2 tsp dried)
1 Tbsp cumin
1 Tbsp chili powder
2 jalapeno peppers -seeded and chopped
3 fresh tomatoes or 1 c. diced canned tomatoes with juice
4 c. cold water (or chicken stock)
1 fresh squeezed lime
1 can black beans, drained and rinsed (I put two because I like more beans:)
2 c. fresh or frozen corn kernals
fresh cilantro -chopped
fresh tortilla chips -crushed
grated Monterey Jack Cheese
Kosher salt
1. Heat the canola oil in a sauce pot over medium-high heat. Saute the red and green peppers, onion, garlic, oregano, cumin and chili powder for 3 minutes, until the onion is translucent, stirring often. Add the jalapeno and tomatoes; continue stirring for one minute. Add the fresh lime juice and cold water.
2. Bring the soup to a boil, reduce the heat and simmer uncovered for 20 minutes. Add black beans and corn and return the soup to a boil. Remove the soup form the heat.
3. Serve with crushed tortilla chips, cilantro and cheese. Season with salt.
Sunday, June 12, 2011
Quinoa and Black Beans
 I was introduced to Quinoa just last year by one of Mike's friends. And then reintroduced by my cousin Mieka with this recipe from allrecipes.com. I love the texture of Quinoa and I love beans. James would tell you, I could eat beans everyday all day. I fell in love with beans in Mexico where I did eat them everyday... sometimes twice or three times a day. AH... that was heaven.
Quinoa and Black Beans
1 tsp. vegetable oil
1 onion, chopped
3 cloves garlic, peeled and chopped
3/4 c. uncooked quinoa
1 1/2 c. vegetable broth
1 tsp. ground cumin
1/4 tsp. cayenne pepper
salt and pepper to taste
1 c. frozen corn kernels
2 (15 oz) cans black beans, rinsed and drained
1/2 c. chopped fresh cilantro
1. Heat the oil in a medium saucepan over medium heat. stir in the onion and garlic, and saute until lightly browned.
2. Mix quinoa into the saucepan and cover with vegetable broth. Season with cumin, cayenne pepper, salt, and pepper. Bring the mixture to a boil. Cover, reduce heat, and simmer 20 minutes.
3. Stir frozen corn into the saucepan, and continue to simmer about 5 minutes until heated through. Mix in the black beans and cilantro.
Thursday, June 9, 2011
Week 2 of Cake Decorating

I am pretty proud of this cake. It is only week two and this is what I took home. I was so pleased with how it turned out. Lyndsey (the teacher) taught us how to make these roses. I thought it was going to be so difficult. Actually it was so easy and so much fun. The design idea I already had in my head before I came. Needless to say, this weeks cake was a big improvement from last week.
I will put Lyndsey's blog on here again, if any of you Utah County people are interested. She is doing some fun mother daughter one time workshops too. It is betheicingonthecake.blogspot.com. She has a facebook page too that she posts pictures of her students work. It is all very impressive. Anna did a great job too. Both of us agreed it was a much better week than last week. I am so glad she found this and signed us up for it. Thanks Anna. I'll have more pictures on my family blog. jamesandlauri.blogspot.com
Here's the Scoop!
 This is for Lydia. This is the cookie scoop I use. James got it for me a couple of years ago for Christmas. I asked where he got it and he said he thinks he got it at Walmart. I have seen them at those fancy cooking stores, but I am sure they are more expensive. I wouldn't buy a really cheap one though, because you are right, they don't work. I'll keep my eye out for one.
THE Chocolate Chip Cookie Recipe
 I would say that this is where I got my start in the kitchen, with this recipe. I am not even sure which cookbook this recipe comes from. I know it is from an old one that my mom owns, but it has been adapted some and I call it my own, because since I was about 14 years of age, it is stored only in my brain. This is one of those recipes that I screwed up a lot of times before I got it right. When I got it right, I made lots of friends. I am pretty sure that Cole Nelson asked me to the Senior Prom just so he could get a dozen of these delicious morsels for himself. I would sell the dough to Spencer's co-workers at the hospital. James loved me before I ever made him a batch of these cookies, but when we were first married I kept our freezer stocked with them all the time..... I don't do that anymore. We learned quickly that frozen cookies don't have any less fat than fresh ones.
My philosophy about cookies is that you use the recipe that works for you. Although I am always willing to share this recipe with anyone, (mostly so I don't have to make them so often) people have told me that they don't turn out quite as good as mine. There is a lot more to cookies than the ingredients. Martha Merrill taught me that. She was sort of my Yoda in the cookie world. I spent pretty much all my after school hours at her house during 7th and 8th grade. Martha was and I would still say she is the master cookie maker. My point is that I really like most peoples chocolate chip cookies as much or sometimes more than my own. This will sound totally ridiculous, but I think we sort of imprint ourselves on the cookies that we make. Thats not to say that you can't use this recipe and make it delicious as well. YOU CAN! Just love the differences too.
Okay, I have way too much to say about cookies, but I can't help it. Cookies are my business. I have lots more delicious cookie recipes to share in the future, but it is only appropriate to share this one first.
THE Chocolate Chip Cookies
1 1/3 c. shortening (honestly, I've tried the off brands and Crisco, the regular kind, just makes them taste better).
1 c. sugar
1 c. brown sugar
2 eggs
2 tsp. vanilla (Mexican vanilla is best, Morilla brand and I usually let a little more fall into the batch because I just love it).
3 c. flour
1 tsp. baking soda
1 heaping tsp. salt
1/2 bag of chocolate chips (nuts, toffee, butterscotch chips, ....whatever you want and any combination, you can throw anything into this dough and it tastes delicious. And as much as you want. I like less, but seriously, don't be frugal if you like the chocolate).
1. preheat oven to 350 degrees
2. cream sugars, shortening, eggs and vanilla just barely enough to break the eggs and get everything dispersed in the bowl. (there will still be chunks of crisco, just scoop what gets stuck to the sides into the bowl and let it mix in later)
3. add flour, soda, salt and turn on the mixer, immediately throw in the chocolate chips (or whatever you want) and mix only until dough stops sticking to sides and it is all together in the dough.
4. scoop onto an ungreased pan. (I ALWAYS use a cookie scoop) bake for 10 minutes (ONLY 10 minutes) Let cookies sit on the pan when you pull them out of the oven to finish baking just a little
That is a really easy recipe with just all of the things I do that work for me. Find what works for you. Just a note, I think every kitchen should have a cookie scoop. I find that cookies are best if they are handled as little as possible with your hands. If a cookie recipe says to roll the dough in your hands... I never do. I scoop it with a cookie scoop and just put it into the sugar, powdered sugar, whatever it is and let it bake as is. Just a trick I learned from Martha a long time ago.
Tuesday, June 7, 2011
Lets go BANANAS
 My hopes for this post, is that you will no longer be afraid to buy a large bushel of bananas thinking that they will be waisted. These are two great recipes that you can throw together anytime if you just have some bananas (extra ripe or not) on hand.
This banana muffin r
 ecipe comes from the Worldwide Ward Cookbook. It is the easiest thing ever. I make these a lot when I just need something on the side of a good casserole or soup or even to spice up your leftovers from the night before. You can put them together in minutes and have them hot and fresh before the soup is done heating up.
Banana Muffins
3 large ripe bananas, mashed
1 c. sugar
1/2 c. margarine or butter
2 c. flour
1 tsp. baking soda
Combine all ingredients. Spoon into greased muffin tins. Bake at 350 degrees for 20 minutes. Simple. Delicious. Perfect!
******
If you need a delicious desert, for a big group of people, this is a hit every time. I got this recipe off of the Internet quite a while ago. It is so good and so moist. You won't be disappointed.
Banana Cake with Maple Frosting
2 1/2 c. flour
1 2/3 c. sugar
1 1/4 tsp. baking powder
1 1/4 tsp. baking soda
1 tsp. salt
2 eggs
2/3 c. shortening
1/3 c. buttermilk (or 1/3 c. milk with 1 tsp. vinegar)
1 1/4 c. mashed bananas
2/3 c. chopped pecans
1. Preheat oven 350 degrees
2. Mix dry ingredients and set aside
3. Beat eggs, shortening, and buttermilk add dry ingredients.
4. Fold in bananas and pecans
5. Pour into a 9x13 greased and floured pan (or two round pans) bake for 30-35 minutes
6. Cool and frost
Maple Frosting
3/4 c. butter
6 1/2 c. powdered sugar
1/2 c. evaporated milk
1 tsp. maple extract
1 dash salt
Combine and beat until smooth.
Monday, June 6, 2011
Stuffed Shells
 This is a fairly recent recipe I have learned and we like it, especially James. He loves Italian food. It makes a LOT so you big families this is a good meal for you and the kids will love it, I promise! (It's cheese, noodles and sauce... how could they not).
I got this recipe from my visiting teaching companion Jaquelyn Penrose. She brought me these just after I had Lucy. Her husband mentioned that it was the first meal she made for him and it was love from then on. This recipe is also on the back of the jumbo shell box, with just a couple of changes. PS. The picture is only a half batch of shells. It makes a lot.
Stuffed Shells
1 box jumbo shells
4 c. (2 lbs) small curd cottage cheese
2 c. (8 oz) grated mozzarella cheese
3/4 c. parmesan cheese
3 eggs
1/4 tsp. pepper
1/2 tsp. salt
1 1/4 tsp. parsley
3/4 tsp. oregano
32 oz. jar spagetti sauce (I like the barilla spicy marinara)
1. Preheat oven to 350 degrees
2. Cook shells according to box instructions, drain, set aside on foil or wax paper.
3. Combine cheeses, eggs, & spices.
4. Spread thin layer of spagetti sauce on the bottom of 9x13 pan.
5. Fill each shell with 2 Tbsp. cheese mix (or just a large spoonful) and place on the pan close together.
6. Cover with sauce (and more cheese if you want. I always want more cheese). Then cover with foil and bake at 350 degrees for 35 minutes.
Sunday, June 5, 2011
White Chili with Chicken (for the slow cooker)
 I got this recipe from my sister-in-law JoEllen. I don't know where she got it, but we were in St. George one weekend and she was preparing it for a party. I only had just a taste of it, but knew with that taste I NEEDED this recipe. It has become one of our favorites. I get frozen fresh green chilis from my mother-in-law in New Mexico, and this is my favorite recipe to put them in. I am so thankful for our New Mexico connection with James' family. My love for green chilis started when I served in Deming, NM. The members there, put green chilis in everything from mexican to italian. It is a good enough reason for me to live in New Mexico permanently one day.
White Chili with Chicken (Slow-cooker)
1 1/4 lbs of chicken (I use frozen and just stick them in the bottom of the slow cooker with the other ingredients on top).
2 cans of great northern beans (or any combination of white beans)
1 can of white hominy
1 envelope of taco seasoning
1 can chopped green chilis (or fresh if you are lucky like me;)
1 can of cream of chicken soup
1 can of chicken broth
1/2 c. sour cream
Serve with:
chopped green onions
shredded monterey jack cheese
(and I like to add a little fresh cilantro as well)
1. put chicken on the bottom and all other ingredients on top except the sour cream.
2. cook on low in a slow cooker for 8 to 10 hours.
3. when chicken is fully cooked, pull it out and shred or cube it and put back in the chili.
4. 1/2 hour before serving, stir in the sour cream.
Saturday, June 4, 2011
Carrot Cake
 Anna and I are taking a cake decorating class this summer. She found this class on craigslist and signed us up for it. It is 4 classes and they provide the cakes and frosting every week for just 60$ total. We take home a cake every week as well. For those located in the Provo area that are interested the blog is betheicingonthecake.blogspot.com. Lyndsey (the teacher) does this beginners class several times a year, but also holds other workshops as well. We had our first class on Thursday, and this is the result. It was a lot trickyer than I thought it would be, but it is a lo
 t fun.
So while we are on the subject of cakes, I will post the famous Carrot Cake Recipe. This is the Food Nanny's recipe from her cookbook, The Food Nanny Rescues Dinner. Liz Edmunds has a show on BYU TV, but I also have attended one of her workshops in person. That is where I first tried this Carrot Cake for myself. It is the most moist and delicious I have tasted, and anyone who has tried it also agrees. This cook book is one of my favorites. I will write more about that later.
Carrot Cake
2 c. flour
2 tsp. cinnamon
1 1/4 tsp. baking powder
1 tsp. baking soda
1 tsp. salt
2 c. sugar
1 1/4 c. canola oil
4 eggs
4 c. peeled and grated carrots (4 or 5 large carrots)
1 c. coconut
1. Preheat the oven to 350 degrees and grease two 9 inch round cake pans. Cut two 9 inch diameter circles out of parchement paper or wax paper and place in the bottom of each pan. Spray again and dust with flour. Shake out the excess.
2. Mix together (in a seperate bowl) the flour, cinnamon, baking powder, baking soda and salt and set aside.
3. In a large bowl of an electric mixer, beat the sugar, oil, and eggs on low speed until well-blended. Mix in the dry ingredients just until blended. Flod in the carrots and coconut. the batter will be thick. Divide the batter evenly into the prepared pans. Bake 35 to 45 minutes util a toothpick inserted in the center comes out clean.
4. Cool in the pans on a wire rack for 10 minutes. Loosen the layers around the edges with a knife. Carefully invert each layer by placing another rack directly over the layer and turning all upside down. Tap on the pan to loosen the layer. Carefully peel of the paper. Cool completely on the racks. Meanwhil, make the frosting (listed below).
5. To frost the cake, place one layer top side down on a cake plate. Spread with half the frosting. Place the second layer top side up on the frosting. Spread the remainder of the frosting of the cake. (No need to frost the side of the cake).
Almond Scented Cream Cheese Frosting
3 c. powdered sugar
1 (8 oz) package cream cheese at room temperature
5 Tbsp butter at room temperature
1 tsp vanilla
1 tsp almont extract
1. Beat until well blended and smooth enough to spread. Avoid over beating, which may make the frosting too soft.
Subscribe to:
Comments (Atom)